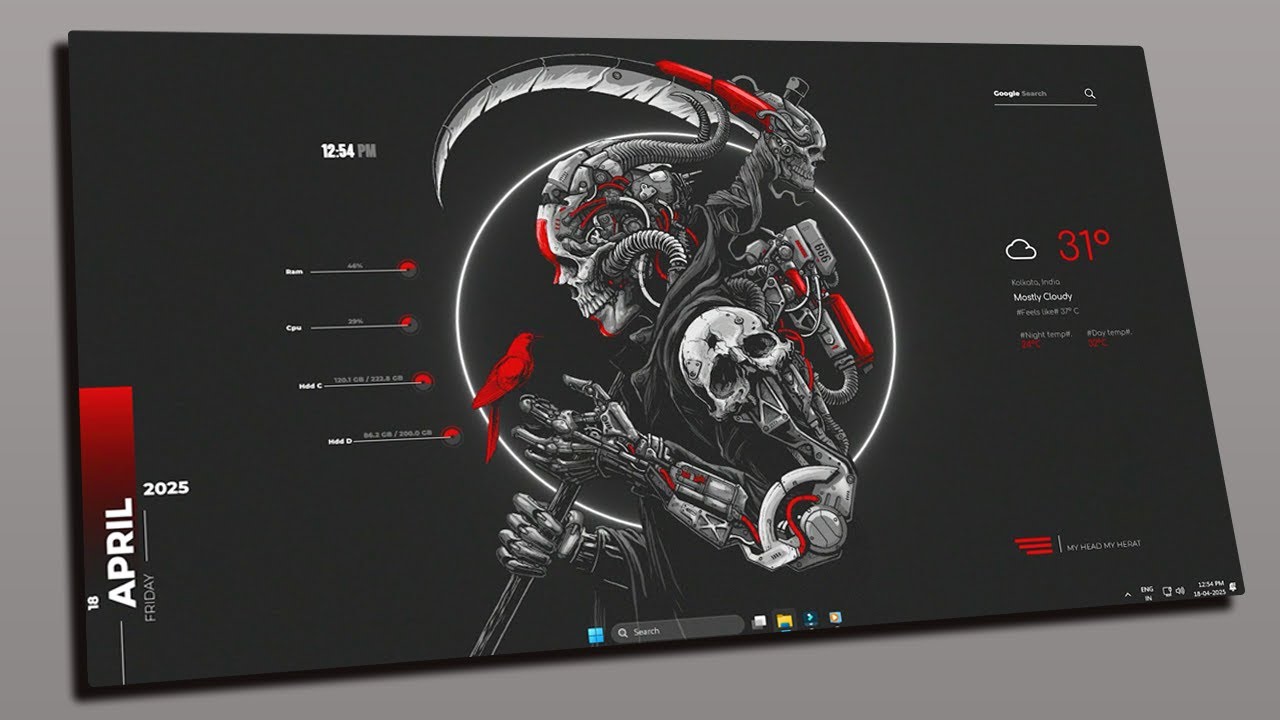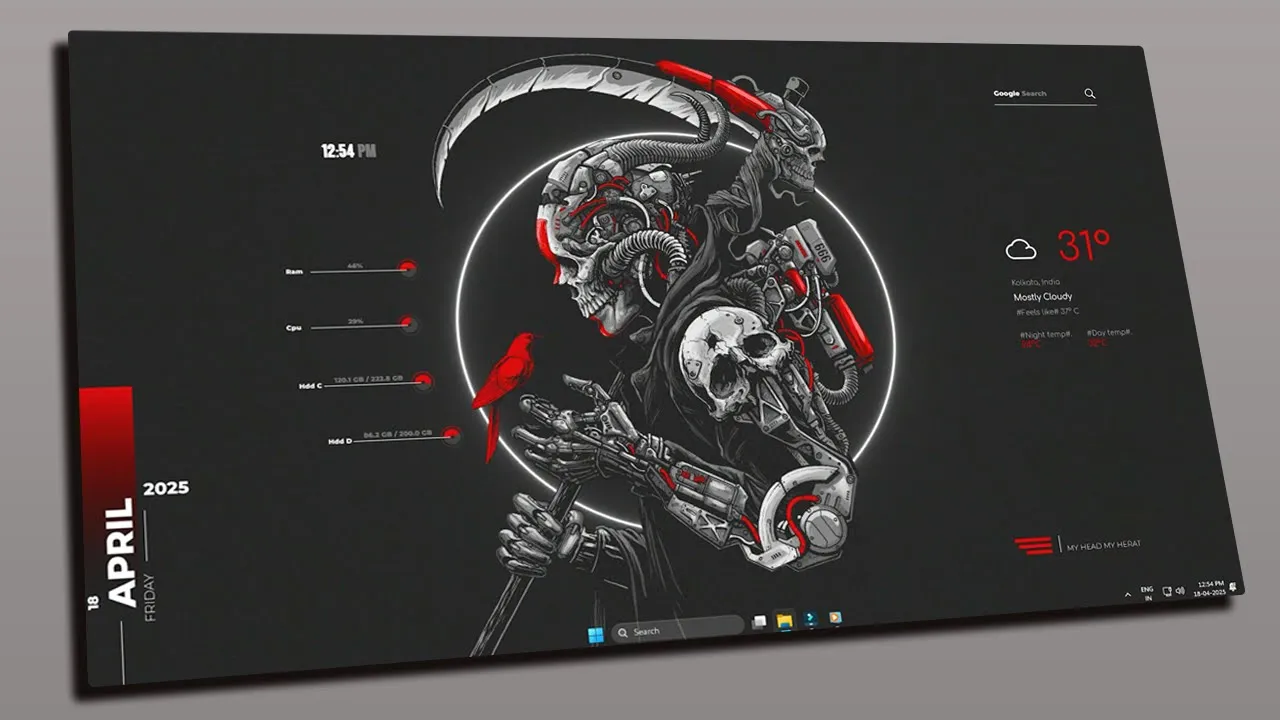
Want a sleek, dark, futuristic desktop that looks like a sci‑fi control panel? In this step‑by‑step guide, you’ll learn exactly how to install and set up the Reaper Rainmeter skin to transform your Windows desktop into a clean, high‑tech dashboard—perfect for gamers, streamers, and customization enthusiasts.
This tutorial follows the workflow from the “Reaper Rainmeter Skin” video and adds extra tips (TranslucentTB, Wallpaper Engine, layout tricks) so your final setup looks as polished as possible.
What Is the Reaper Rainmeter Skin?
The Reaper Rainmeter skin is a dark, modern Rainmeter theme designed to give your desktop a cohesive, futuristic look with widgets for:
- System stats (CPU, RAM, GPU, network, disk)
- Clock and date
- Music player controls
- Quick shortcuts and labels
It’s built for users who love minimalist dark setups with high contrast accents and a “dashboard” feel rather than scattered icons. Rainmeter itself is a free Windows desktop customization tool that lets you add skins (widgets) to your desktop for visuals and functionality.
What You’ll Need Before Starting
Make sure you have these ready:
- Windows 10 or Windows 11 PC
- Rainmeter installed (latest stable version)
- Reaper Rainmeter skin package (ZIP with skins + wallpaper)
-
(Optional but recommended)
- TranslucentTB – for a transparent taskbar
- Wallpaper Engine – for animated/live wallpapers
If you don’t have Rainmeter yet, install it first from the official site before proceeding.
Step 1: Download the Reaper Rainmeter Skin Package
- Go to the download link provided in the video description (or the skin’s official page).
- Click the Download button for the Reaper Rainmeter skin (usually a
.zipfile). - Save the file to your Downloads folder or another location you can easily find.
Tip: If the site offers multiple versions, pick the latest stable release compatible with your Rainmeter version.
Step 2: Extract the Skin Files
- Open your Downloads folder (or wherever you saved the ZIP).
- Right‑click the Reaper Rainmeter skin ZIP file.
- Choose Extract All… (Windows built‑in extractor) or use 7‑Zip / WinRAR.
- Click Extract and wait for the process to finish.
-
Open the newly extracted folder—you should see:
- Skin files (
.ini, folders for each widget) - A wallpaper image
- Possibly a Rainmeter theme/package installer (
.rmskinor similar)
- Skin files (
Keep this folder open; you’ll need it in the next steps.
Step 3: Apply the Included Wallpaper
A big part of the Reaper look comes from the matching wallpaper.
- In the extracted folder, locate the wallpaper image (usually a
.jpgor.png). - Right‑click the image and select Set as desktop background (or open it and click “Set as background”).
- Make sure the wallpaper is set to Fill or Fit so it covers the entire screen cleanly.
This gives you the base visual style before adding widgets.
Step 4: Install Rainmeter and the Reaper Skin
4.1 Install / Update Rainmeter (if needed)
If Rainmeter isn’t installed yet:
- Download Rainmeter from the official website.
- Run the installer and follow the on‑screen steps.
- After installation, Rainmeter should start automatically and show default skins.
4.2 Install the Reaper Skin Package
Depending on what’s in the extracted folder:
Option A – Using a .rmskin package (recommended if available)
- Double‑click the Reaper
.rmskinfile. - The Rainmeter Skin Installer will open.
- Follow the prompts to install the skin.
- When asked, allow Rainmeter to load the skin after installation.
Option B – Manual install from folder
- Open the Rainmeter Skins folder (usually
Documents\Rainmeter\Skins). - Copy the Reaper folder (from your extracted download) into this
Skinsdirectory. - Right‑click the Rainmeter tray icon → Manage → you should now see “Reaper” in the left panel.
Step 5: Unload Default Rainmeter Skins
To avoid clutter and conflicts:
- Right‑click any default Rainmeter widget on your desktop.
- Select Skin actions → Unload skin (or Unload).
- Repeat for all pre‑loaded/default skins until your desktop is clean.
Alternatively:
- Right‑click the Rainmeter tray icon → Manage.
- Under each loaded skin, click Unload.
This ensures only the Reaper widgets will be visible.
Step 6: Hide Desktop Icons for a Clean Look
For that true “dashboard” feel:
- Right‑click on an empty area of your desktop.
- Go to View.
- Uncheck Show desktop icons.
Your desktop will now show only the wallpaper and Rainmeter widgets.
Step 7: Load the Reaper Skins in Rainmeter
- Right‑click the Rainmeter icon in the system tray (near the clock).
- Click Manage to open the Rainmeter management window.
- In the left panel, find and select Reaper.
- You’ll see a list of
.inifiles (individual widgets).
For each widget you want:
- Double‑click the
.inifile, or - Right‑click it and choose Load.
Typical widgets to load:
- Clock / Date
- System monitors (CPU, RAM, GPU, etc.)
- Music player
- Shortcuts / labels
Load them one by one so you can position each as it appears.
Step 8: Arrange and Customize the Widgets
Now it’s time to make the layout your own.
- Drag each widget to your preferred position. Common layouts:
- Clock and date centered or top‑right
- System stats in a vertical column on one side
- Music player near the bottom or center
-
To fine‑tune:
- Right‑click a widget → Skin actions → Settings (if available).
- Adjust colors, fonts, or sizes if the skin supports it.
- Match widget positions to the wallpaper’s focal points for a balanced look.
You can follow the arrangement shown in the video or design your own style.
Step 9: Make the Taskbar Transparent with TranslucentTB
A transparent taskbar makes the Reaper setup look much cleaner.
9.1 Install TranslucentTB
Option A – Microsoft Store (easiest)
- Press
Win + Sand search for Microsoft Store. - In the Store, search for TranslucentTB.
- Click Get / Install.
Option B – GitHub
- Visit the TranslucentTB GitHub releases page.
- Download the latest installer (
.exeor.msix). - Run the installer and follow the prompts.
9.2 Configure Transparency
- After installation, TranslucentTB should start automatically.
- Right‑click the TranslucentTB icon in the system tray.
-
Under Desktop, choose:
- Clear – fully transparent taskbar
- Blur or Acrylic – frosted glass effect
- To keep it always on:
- Right‑click the tray icon → enable Open at boot.
Your taskbar will now blend into the wallpaper, making the Reaper widgets stand out more.
Step 10: Add Animated Wallpapers with Wallpaper Engine (Optional)
For an extra “living dashboard” vibe, use Wallpaper Engine to add animated or interactive wallpapers.
- Purchase and install Wallpaper Engine from Steam (if you don’t have it).
- Open Wallpaper Engine and browse the workshop for:
- Dark, futuristic, cyberpunk, or abstract animations that match the Reaper theme.
- Select a wallpaper and click Apply.
- Adjust settings (FPS, audio reaction, etc.) as desired.
Combine this with the transparent taskbar and Reaper widgets for a truly next‑level desktop.
Step 11: Lock Widget Positions in Rainmeter
Once you’re happy with the layout:
- Right‑click the Rainmeter tray icon → Manage.
-
For each loaded Reaper widget:
- Uncheck Draggable (so you don’t accidentally move them).
- Click Refresh all to apply changes.
This keeps your setup stable and prevents widgets from shifting.
Step 12: Share Your Setup and Get Inspired
Now that your Reaper Rainmeter setup is complete:
- Take a screenshot of your desktop (
PrtScn,Win + Shift + S, or your preferred tool). -
Share it:
- In the comments of the original YouTube video
- On Reddit (r/Rainmeter, r/desktopcustomization)
- On Discord communities focused on desktop themes
- Look at other users’ setups for new ideas: different wallpapers, widget arrangements, and color tweaks.
Troubleshooting Tips
Widgets not showing up?
- Make sure Rainmeter is running (check system tray).
- Confirm the Reaper folder is inside
Documents\Rainmeter\Skins. - In Rainmeter Manage, ensure the
.inifiles are loaded (not just listed).
Widgets look misaligned or cut off?
- Try a different screen resolution or scaling setting.
- Right‑click the widget → Skin actions → Settings (if available) to adjust size/position.
Taskbar not fully transparent?
- In TranslucentTB, ensure Clear is selected for Desktop.
- Some apps (full‑screen games, certain overlays) may temporarily override transparency.
- Update TranslucentTB to the latest version from GitHub if issues persist.
FAQs
Is the Reaper Rainmeter skin free?
Most community Rainmeter skins, including Reaper‑style packs, are free to download and use. Always check the specific skin page for licensing or attribution requirements.
Does this work on Windows 11?
Yes. Rainmeter, TranslucentTB, and Wallpaper Engine all work on Windows 10 and Windows 11. Some taskbar transparency behavior may vary slightly between versions, but the overall setup process is the same.
Will this slow down my PC?
Rainmeter and TranslucentTB are lightweight. Impact depends on:
- Number and complexity of skins loaded
- Whether you use animated wallpapers (Wallpaper Engine uses more GPU/CPU)
If you notice performance issues, reduce active widgets or switch to a static wallpaper.
Can I customize colors and fonts in the Reaper skin?
Many Rainmeter skins allow customization via:
- Built‑in settings (Right‑click → Skin actions → Settings)
- Editing the
.inifiles directly (for advanced users)
Check the skin’s documentation or readme for supported options.
Final Thoughts
With the Reaper Rainmeter skin, a transparent taskbar via TranslucentTB, and optionally Wallpaper Engine, you can turn a standard Windows desktop into a sleek, futuristic dashboard that feels both functional and visually striking.
Follow this guide step by step, tweak the layout to your taste, and share your final setup with the Rainmeter community.
If you found this guide helpful, explore more Rainmeter skins, themes, and tutorials on RainmeterPro.in to keep evolving your desktop customization game.